CLICK HERE FOR FREE BLOGGER TEMPLATES, LINK BUTTONS AND MORE! »

Sunday, January 30, 2011

Tweet Tweet

No this is not about Twitter! 

I have been obsessed with stamps lately and especially wood ones.  I just love how they stamp compared to the acrylic type.  The bad thing is they are pretty expensive in comparison unless you hit the dollar bins at Michael's and JoAnn's which is exactly what I do. 

Today's card is one I made using a dollar bin stamp I found at Michael's.  I have started getting into coloring the images and this is actually my first attempt.  I am so glad it came out well. 

4 layers

The branch & bird were stamped.  The inside of the branch was colored with colored pencil.

Tied a cute ribbon bow for more detail

Sentiment is stamped and embossed

Used two shades of pink ink to color the flowers which are also stamped

Wow, it's been a busy few weeks.

I have been busy busy making new cards.  I can't even remember which ones I posted here and which ones I haven't.  Should I post them all at once or give each card it's due and make separate posts?  I guess I'll just start with one card for now.

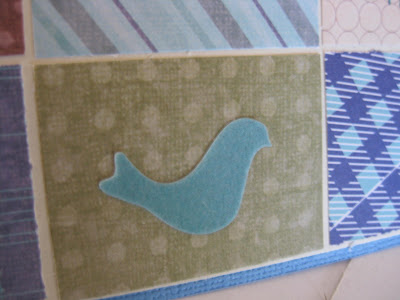
I was inspired by a picture in a magazine for this adorable patchwork card.  I love the look of it.  Let me tell you though, math is not my strong area (how I work in accounting, don't ask!) so it took me awhile to get the measurements for the patchwork rectangles right.  After I figured out the dimensions the rest was easy.  Pick pretty paper and embellishments.


Sunday, January 23, 2011

Hawaii Themed Birthday Card

I made this awesomely cute card for a friend of mine.  I started out with one idea but it all changed once I started making the card.

I started out with making Hawaiian looking flowers like I made for my scrapbook page (pictures posted previously) and the hula girl.  I put it all together and it just didn't look right.  The hula girl needed an environment.  She looked off just there with nothing but flowers next to her.  I scrapped the idea of flowers and decided to create a scene for her.

Hawaiian Themed card
The sky is actually the base of the card.  For the ocean I dry embossed using my Cuttlebug and then inked it to give it two shades of blue rather than the on.  On top of the ocean I place a shiny tan colored cardstock that I also embossed.  I tried to ink it but the ink just slid right off.  Note to self: glossy paper = no good with ink.

Next came the palm tree or is it a cocnut tree?  The palm trees here don't grow coconuts so there's my confusion!  Anyway, isn't it cute?!  I embossed that using the Cuttlebug and a Sizzix embossing folder that I got for 60% off at Joann's.  I inked it to make the textured look give it a more real look.  The coconuts were actually scraps form another card that I had laying on the table.  Score!
Coconut Tree

Little miss hula girl is precious.  I cut her out and pieced her together giving her skirt and hair flower double layers.  I drew in her face with pencil.  Let me tell you...that is hula girl #2.  Number 1 looked like the wicked witch of the west (that's the ugly witch right?).  I had her all ready to go and then drew in her face....umm, she looked so horrible!!  I had to take all the pieces off and redo her body/face.  Oh, and her leg foot off!  Hahaha.  The one I ended up with is perfect.  No funky face and she has two feet!


Hula girl


A lot of work went into this card but it was fun to make and I love the end result!

Friday, January 21, 2011

Pinterest

My Pinterest

So what is Pinterest you ask?  Well only one of the coolest sites ever!  It's like a virtual pinboard.  You know one of those things you hang on your wall and pin pieces of paper to.  It's like that but much more modern. Before Pinterest I would just look things up on the internet and save them to my bookmarks.  The pain in that is when I need to find something I have to go through practically every bookmark to find that one picture I saved because of course I have no clue what site I got it off.

With Pinterest there's no need to have a bagillion bookmarks anymore.  You can "pin" a link or pictures/images to your "board".  Remember all this is virtual so when you see something online you like you click your pin icon (which you get off Pinterest) and you are able to pin whatever image or site you would like to whatever board you that you have created.  It pretty much downloads it to the site for you.  For instance, I have pictures of cards I found online that I like and pinned them to my "Cards" board.  Doing it this way I have everything in one place and a visual of each item without cluttering up my bookmarks or a folder on my computer.  There will be a link under the image to the site you downloaded it from and you are able to add a description and tags.

As with many of the popular social networks you can follow people on Pinterest that way you see what they are pinning and you can repin something they have.  It's really a cool site and perfect for those people that are forever looking at things online for inspiration.  One catch though, you have to be invited in order to use the site.  Either you can go to the site and request it or you can request an invite from a member.   It takes a few days for an invite from the site but if you request from a member you are able to become a member as soon as they invite you via email.

Each member is given 5 invites.  If you would like an invite email me, message me, or leave a comment with your email address.  I still have 5 left.

www.pinterest.com

Monday, January 17, 2011

First card order = COMPLETE!

The title tells all!  I am finally done.  It was fun making the cards and it seems I may have gotten another order...a custom order this time.  Yippee.

Today's card, the one that has completed my first card order, is so adorable!  I had to get some inspiration for this one so I used the site www.pinterest.com and consulted my "board" for ideas.  I'll get into detail about Pinterest in another post.  OK, and here is the unveiling....dun dun dun!

Just Because sentiment card

Adorned with a purple ribbon and pink flower


I made a second card (this is the one that I made for the order).

Heat embossed with sparkle powder

Isn't it cute?  It is simple yet beautiful and I probably used some of the paper I bought a Joann's yesterday.  I actually made two cards, one for the order and one for etsy.

Oh did I mention I went to Michael's today.  Oh gosh did I go crazy there too!  I bought the stamp I used for this card out of the dollar bin.  Awesome deal!

Sunday, January 16, 2011

Paper Galore!


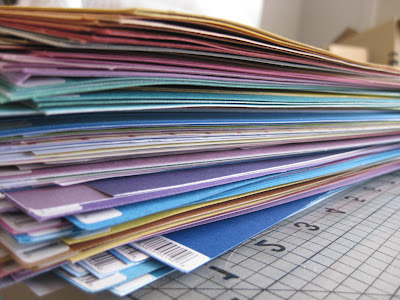
Oh my goodness did I go crazy at Joann's today.  I walked in there intent on raiding the open stock paper.  It is on sale for 6 for $.96.  This is the best sale I've seen on open stock paper anywhere so of course when I saw it in an ad a few weeks ago I was excited and impatient.  They don't have their paper this cheap too often so now is the time to buy and buy I did.

I walked in a few minutes after they opened and walked straight to the paper.  I was like a madwoman and by the time I had raided just two sections I was overloaded.  I had to take a step back and reassess my game plan.  How is it that I already had over 100 sheets of cardstock and I had only gone through two of the rows?  I know how...madness!  I put it all the paper back in their proper slots, left the store and went to my car for a moment to breathe.  "OK, there's no way I can buy 4 of each color paper, that's insane" is pretty much what I told myself while standing at my car trying to figure out how to go about calmly buying paper.

After a few minutes I was ready to go back in.  This time around I slowly grabbed one of each color cardstock and a few of some of the colors I already have plans for.  I went to the decorative paper next and did the same, well kind of.  I grabbed two of some that I really liked.  I counted the paper after I was done and had about 250 sheets.  OH GOSH...still way too many!  I went through each piece and put back some of the duplicates I had grabbed of the decorative paper and whittled down the amount of paper I had by a little but not much at all.

Next it was off to embossing powders and embossing folders.  I found a jar of sparkle powder for $1.97 on clearance.  Not too bad.  I also bought two sets of two embossing folders that were originally $15.99 but on clearance for $6!!  Woohoo!  Two are obviously Christmas folders but the other two can be used for any occasion.  I still had a 50% off one item coupon so I bought a ribbon I can us for Valentine cards and my adventure was over.  I made sure it was over.  I had to.  I knew the total was going to come out to way more than I had planned on spending.  Oops!

I apologized as I walked to the cash register.  The nice customer I was, I set up the paper for the cashier so all the barcodes were on the same side as she was scanning.  She chatted with me as she rang up my massive amount of paper and we joked about how long the receipt was.  What if I needed to return something?!  Hahaha.  The damage wasn't too bad but still a nice chunk of change.  But guess what?  I  have plenty of paper to last me forever!  Now all I need is more storage!  


The longest receipt ever

Saturday, January 15, 2011

Get Well card

I have two more cards left to make for my first order!  Yay!  Tomorrow Joann's is having their 6/$.96 sale on open stock paper.  I am so excited for that.  I have to stock up on a ton of paper so I can recreate some of the cards I've already made.

Here is today's card.  "Get Well".


I used my usual techniques on this card: inking, dry embossing, and powder embossing.  This card is similar to the one I sent to my grandparents but I loved the color combo so much that I had to make another using the same paper.  There are some differences to this one.

Well, I'm off.  It's date night with the hubby!

Wednesday, January 12, 2011

Adorable cards!

Oh do I have some cute cards to show you tonight!  I think they are ADORABLE!

First, some news though.  I decided it was time to open an etsy shop.  It was actually kind of scary.  All these questions kept going through my mind like will any of my cards sell?  Will people like them?  Are they good enough quality, etc.  I guess that's normal when starting a new adventure.  I'm totally fine now though.

For those that don't know, etsy is an online forum for people to sell their handmade items along with other types of products.  I got my first order the other day and that's what prompted me to open an etsy shop.  I don't have many items to sell quite yet but I'm working on it.   

I have been working daily on stocking my shop and here are the 3 cards I have completed so far:

New Baby Congrats Card

Onsies make up the banner
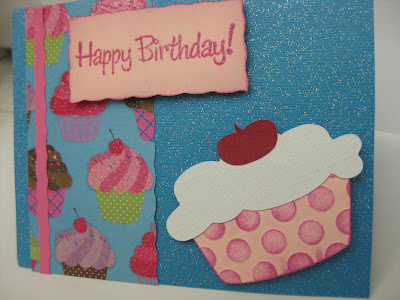
Cupcake bday card


Isn't the cupcake adorable?


Can't forget the little boys!


Boy bday card


So there are my prides and joys for this week.  Not sure what else I will come up with in the next few days but I'll be adding pictures here and posting to my etsy shop as I go.  My etsy shop link is as follows:

http://www.etsy.com/shop/19Eighty

Enjoy!

Sunday, January 9, 2011

Seeing Spots

I have two cards to post but I'll just post one for now.  This one came from SVG Cuts' A2 Cards for all Occasions.  I didn't have to do any embossing or inking with the exception of on the tag because there's already so much going on with it.  It's a cute card.


Thursday, January 6, 2011

Smile!

The other day I decided to try and cheer someone up by making them a card.  This person is going through a rough time and I thought she needed a smile.  Here is the card I came up with.

Oh so pretty

Stamped & embossed

Embossed w/Cuttlebug and inked

 I don't think this person received the card as of yet.  They don't live within the state I live in so it may take a few days.  I sure do hope I sent it to the correct address!  It would be a shame for it to float around in mail space for too long.

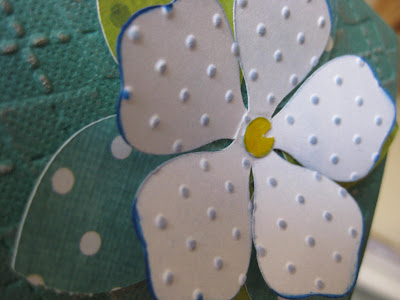
The flower is from the 3D Flower Collection II from www.svgcuts.com.

I used the Cuttlebug to emboss the flower petals and also the background on the card.

Hope this card made someone smile. 

Tuesday, January 4, 2011

Valentine's Day Card

My friend had a great idea the other day while I was at her house.  She said we should make Valentine's Day cards for our husbands.  Ahh, how I loved that idea seeing that I keep trying to find reasons to make cards!

I wanted to make one that wasn't too girlie yet not too manly so I kind of combined the two.

I think the grey strip makes it less girlie.

Caption


Blinged out with hearts


I love the silhouette of the children.  I searched images for children kissing and this came up.  I had to work some magic in Photoshop to make it show up correctly in my program (Make the Cut) but I was so happy when I made it happen.  I am easily pleased.

The grey strip down the side reminds me of a mechanic shop or something.  The the tearing made it more rough and not so "put together".  I was a little iffy about it but I stuck it on there and added some ribbon to dress it up a little.

For the "I Love You" caption I used a rotary cutter my mother-in-law bought me for Christmas then inked the edges.  I also stamped the "I Love You" then embossed it with clear embossing powder.  I LOVE that rotary cutter and my heating tool!  The heating tool I got from my sister as a Christmas present.  As for the cutter, I used to use the scissors for cutting but trying to make your cuts straight was a pain so the rotary cutter has made life much easier.  It came with a few different blade options, one of them being a scouring blade which I have been using to make a bend in the pop up card captions. 

Speaking of pop-up card captions, I did a pop-up "I Love You" in the inside and attempted to glitter it but it came out terrible.  Sorry, no pictures of that will be posted but Andrew gets to see it when he gets the card.  Haha, yes I plan to give it to him with the ugly "I Love You" glitter words.  Hey, I tried.